
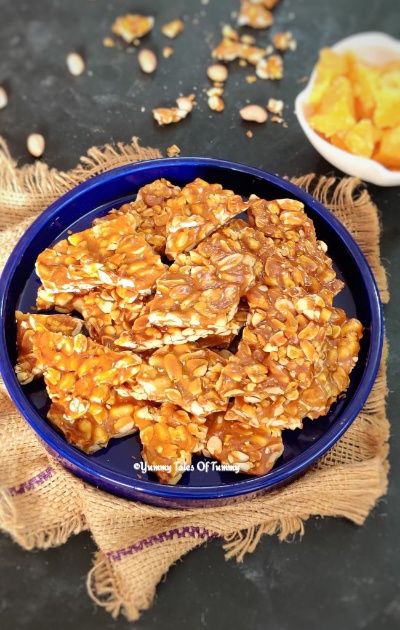
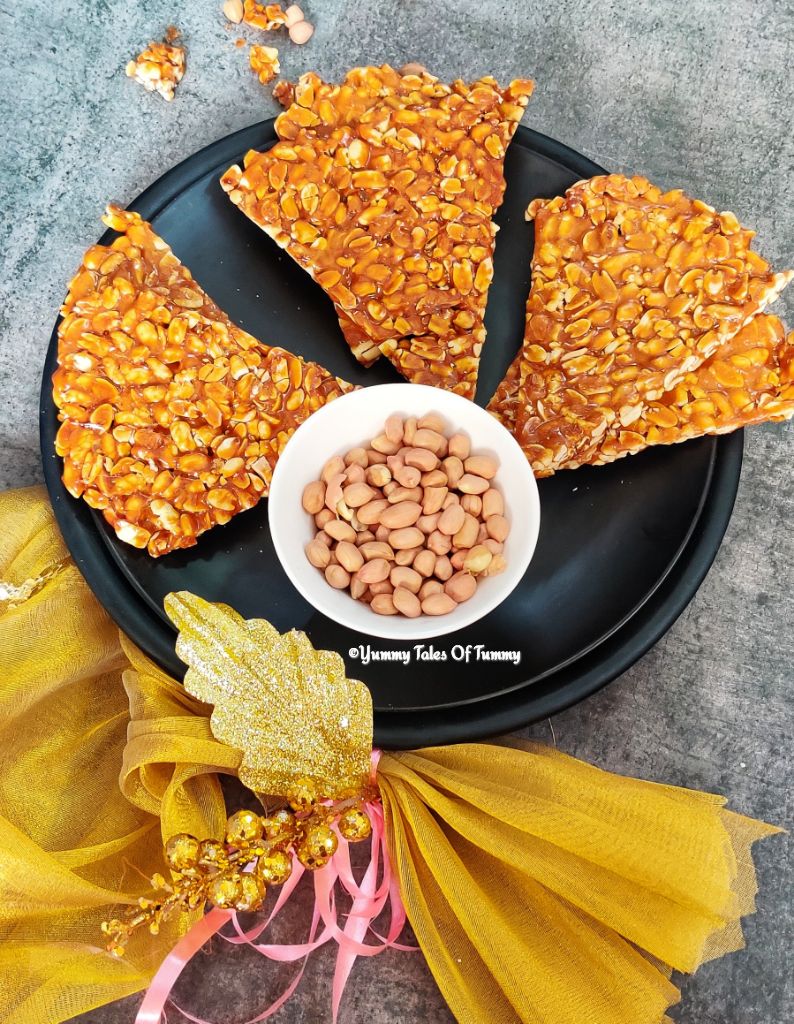
How to make Peanut Jaggery Chikki | Peanut Chikki | How to make Gajak | Gajak Recipe | Recipe of Peanut Chikki with step by step instructions

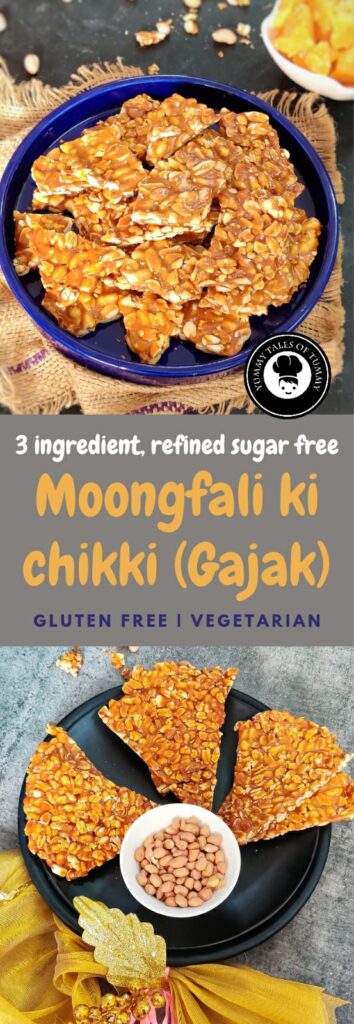
Learn how to make just 3 ingredient peanut jaggery Chikki | Moongfali chikki| Peanut Chikki (also known as Gajak) a very traditional Indian sweet candy/brittle made with roasted peanuts and jaggery under 30 minutes.
It’s refined sugar free, crunchy, delicious and truly addictive. In addition to that, it is gluten free, vegetarian and egg free.
This super easy Peanut Chikki recipe with Jaggery will make you fall in love with this classic Indian dish.
Loved all over India, it’s a speciality of Makar Sankranti in winter season. And because this peanut chikki recipe uses jaggery as a main ingredient, it is even more healthier choice.
My other recipes Lilva kachori, Alu ke pakode, Sindhi sanna pakoda/Onion fritters and Coconut and roasted peanut pops are worth trying during kite festival time.
What is Jaggery or Gud?
Jaggery is known as gud/gur in Hindi, Indian languages is unrefined sugar. It is obtained from raw, concentrated sugarcane juice.
Its widely popular and consumed in India and other Asian countries to make various delicacies specially for desserts.
How to make Peanut Jaggery Chikki | Moongfali chikki | Groundnut Chikki, a must during Makar Sankranti
The festival of Makar Sankranti reminds me of delicacies like Dahi vada, Vada pav, Bread rolls and Bread samosa.
Similarly, Chikki or layee (sindhi word) with peanuts, sesame seeds, bhuna chana or nuts and jaggery mixture marks the onset of winter, as this crunchy brittle, makes for the perfect pick me up snack when flying kites.
Moreover, I have shared tips and tricks to make this chikki perfect which otherwise turns out sticky and stringy.
Go through the step-by-step photos to know how you can make yummy peanut chikki at home under 30 minutes.
Homemade v/s readymade chikki
My vote goes to homemade chikki as it’s much more healthier and I know what goes into it.
While it’s so convenient to buy readymade from the stores, but many times it has liquid glucose, high amount of refined sugar or corn syrup added to get that crunch.
Recipe of my Mother in law
I find many of her recipes a treasure as all of it are no fail ones. First thing she taught me about making chikki is to choose right kind of jaggery.
She always used chikki ka gud which is easily available in local stores during winter season to make chikki.
She advised me to refrain from any other kind of jaggery like organic, premium quality or unrefined jaggery. As these would turn chikki very stringy once you reach hard ball consistency.
Can I replace jaggery with sugar?
Yes, of course. For this recipe, just replace 150 grams of jaggery with 125 grams (more or less according to your taste) of sugar and follow the same method to make chikki.
How to Store?
Once cooled and snapped into pieces, Chikki stays good at room temperature for three to four weeks. Do not refrigerate this.
Store this in air-tight container and keep away from catching humidity.
If you wish to stack peanut brittle in a pile, slide a piece of parchment paper between each piece to avoid sticking.
Recipe Card 🔽
How to make Peanut Jaggery Chikki | Moongfali chikki | Groundnut Chikki
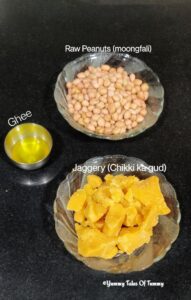
Ingredients
Method
- To begin with, prepare the rolling pin and the board/steel plate on which you will spread the chikki by greasing it with ghee and keep it aside.
- In a heavy bottom pan let's first roast peanuts on low flame.
- This step is crucial as if roasted on high flame the Peanuts would brown quickly but would be raw from inside.
- Keep stirring constantly to have a even browning effect on peanuts.
- Once done, let it cool down and then remove the peels of Peanuts by rubbing them between your palms.
- With the help of pav bhaji masher or steel bowl/katori crush the Peanuts coarsely.
- Then heat a heavy bottom pan and add ghee.
- Warm it, add grated Jaggery and 2 teaspoons of water.
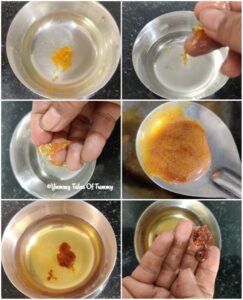
- Cook it on low-medium flame stirring continuosly till the Jaggery melts and the syrup reaches hard ball consistency.
- Check it by dropping liquid jaggery in cold water. It should set immediately and it should break easily making the crunch sound.
- Once done turn off the flame and add the roasted peeled peanuts and mix till everything is combined and the peanuts are well coated with jaggery syrup.
- Immediately switch off the flame. Then transfer this mixture out on a greased butter paper.
- By using greased rolling pin spread it evenly to around 1/4 inch thickness on a flat surface.
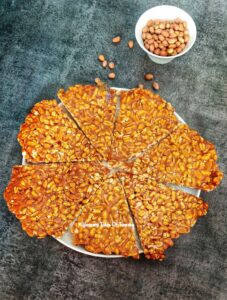
- Lift the butter paper/ parchment paper and make cut marks with sharp knife of desired shape.
- Let it cool completely. This way, the chikki will snap easily once cooled.
- Break into pieces. Store in an air tight container. It lasts about a month at room temperature.
Notes
Steps to make Peanut Chikki
To begin with, prepare the rolling pin and the board/steel plate on which you will spread the chikki by greasing it with ghee and keep it aside.
In a heavy bottom pan let’s first roast peanuts on low flame. This step is crucial as if roasted on high flame the Peanuts would brown quickly but would be raw from inside.
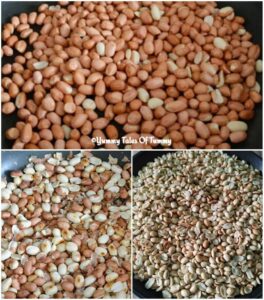
Keep stirring constantly to have a even browning effect on peanuts.
Once done, let it cool down and then remove the peels of Peanuts by rubbing them between your palms.
With the help of pav bhaji masher or steel bowl/katori crush the Peanuts coarsely.
Then heat a heavy bottom pan and
add ghee. Warm it, add grated Jaggery and 2 teaspoons of water.
Cook it on low-medium flame stirring continuosly till the Jaggery melts and the syrup reaches hard ball consistency.
Check it by dropping liquid jaggery in cold water. It should set immediately and it should break easily making the crunch sound.
Once done turn off the flame and add the roasted peeled peanuts and mix till everything is combined and the peanuts are well coated with jaggery syrup.
Immediately switch off the flame. Then transfer this mixture out on a greased butter paper.
By using greased rolling pin spread it evenly to around 1/4 inch thickness on a flat surface.
Lift the butter paper/ parchment paper and make cut marks with sharp knife of desired shape.
Let it cool completely. This way, the chikki will snap easily once cooled.
Break into pieces. Store in an air tight container. It lasts about a month at room temperature.
Recipe Notes For Peanut Chikki
1. Measure and keep your ingredients ready near worktop before you progress to begin. Timing is critical while making chikki.
2. Always grease the rolling pin and board/plate on which you will spread the peanut chikki before you start preparing it because this chikki firms up quickly and then it will be difficult to roll it.
3. Don’t overcook the jaggery else it will taste bitter.
4. The right consistency to make chikki is very important. It’s neither too soft nor hard.
5. If the jaggery will be over cooked then the peanut chikki will turn very hard. If under cooked, it will stick to your teeth. So make sure to cook jaggery on lowest flame till it gets the right consistency.
6. Make cut marks while the peanut chikki is still warm. Once it’s cooled down it can easily broken into pieces.
7. This recipe is versatile. With the base of jaggery syrup you can substitute peanuts with bhuna chana dal, cashews, walnuts, Hazel nuts or almonds.
I hope you guys enjoyed reading my today’s post. Please share your valuable feedback in comments with us, as we love to hear from you.
You can follow me on Facebook, Instagram, Pinterest, and on Twitter.
I will see you soon with yet another interesting recipe. Come right back as I love to have you around.
Happy Cooking
Regards❤️
Lata
Pin it for future reference 🔽

")
")
 | Fulka Recipe")

