
3 ingredient Instant khoya | Milk powder Mawa Recipe | Instant Mawa Recipe | Instant khoya recipe | Instant Khoya from Milk Powder with step by step instruction
Learn to make pure, high quality 3 ingredient Instant khoya | Milk powder Mawa at home which is a star ingredient of Indian cooking specially for desserts.
It adds hint of richness, flavor and sweetness to Indian sweets like Gulab jamun, burfi, Doodh peda, Kalakand and kulfi to name a few.
Making from scratch at home this khoya guarantees best quality since you have complete control when it comes to ingredients.
It’s not always possible to source readymade mawa/khoya, so why not make it home with just 3 ingredients and in 15 minutes.
Here are few of my from scratch-homemade recipes, which are known as kitchen basics –
Homemade Condensed milk recipe
2 ingredient homemade coconut milk
Almond milk (homemade and only 2 ingredients)
What is khoya/mawa/mava?
Khoya also known as mawa, mava or koa is prepared by simmering and reducing preferably, full fat milk until all the liquid evaporates and milk solids obtained from it.
It is a creamy ingredient with a slight sweet and nutty taste. It’s majorly used in making sweets but often used in making koftas and curries which lends a delicious flavour and richness to the dish.
So if you guys are up to the challenge of making instant mawa from milk powder within few minutes, then this is the post you need. It is really simple, I promise!
What are the main ingredients to make 3 ingredient Instant khoya | Milk powder Mawa
If you are up to the challenge of making instant mawa from milk powder, then this is the post you need. It is really simple, I promise!
The 3 ingredients used to make this instant recipe are –
Ghee – we only need a few tablespoon for that rich nutty aroma.
Milk – Use full fat milk for a richer and creamier taste.
Milk powder – I use Nestle brand.
Recipe Card to make 3 ingredient Instant khoya | Milk powder Mawa
3 ingredient Instant khoya | Milk powder Mawa
Ingredients
Method
- To begin with measure out the ingredients and keep aside. Once we start cooking process to make khoya, it really needs speed.
- Heat ghee in a non stick pan on a low flame. Once it's melted add milk to this. Keep the flame low and let the milk come to a gentle boil.
- After that add milk powder by continuously stirring with a soft spatula so that no lumps are formed.
- After a while the mixture will start to thicken and you will easily able to fold it over itself.
- Cook further for 1-2 minutes more till the mixture appears soft and smooth. It will soon start to leave the edges and turn into a lump.
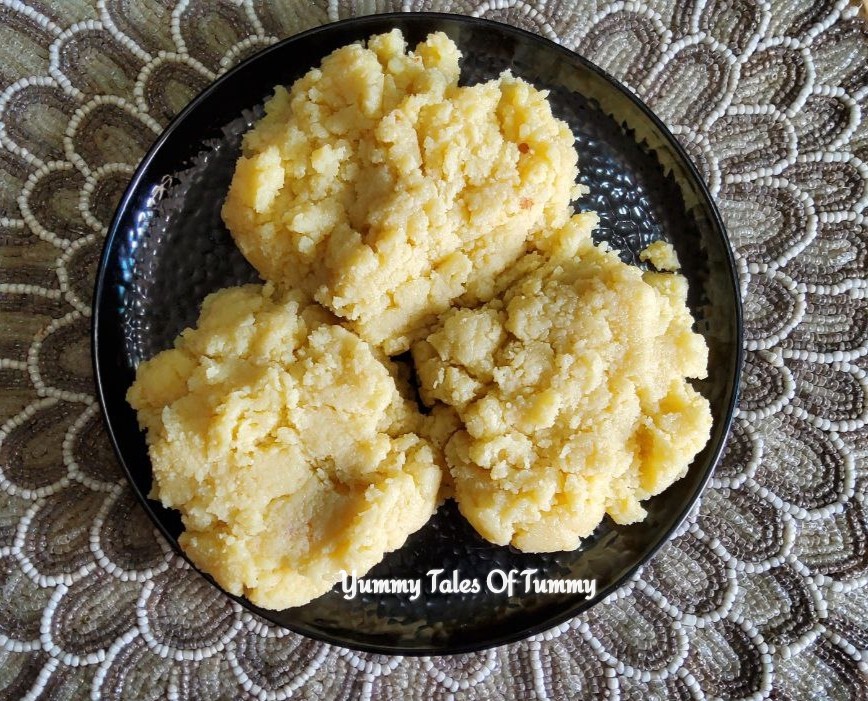
- Take off from the stove and while still warm, immediately shape it into big round balls. Once cooled down, store in the fridge for 3 to 4 days Or freeze for a month in ziplock bags.
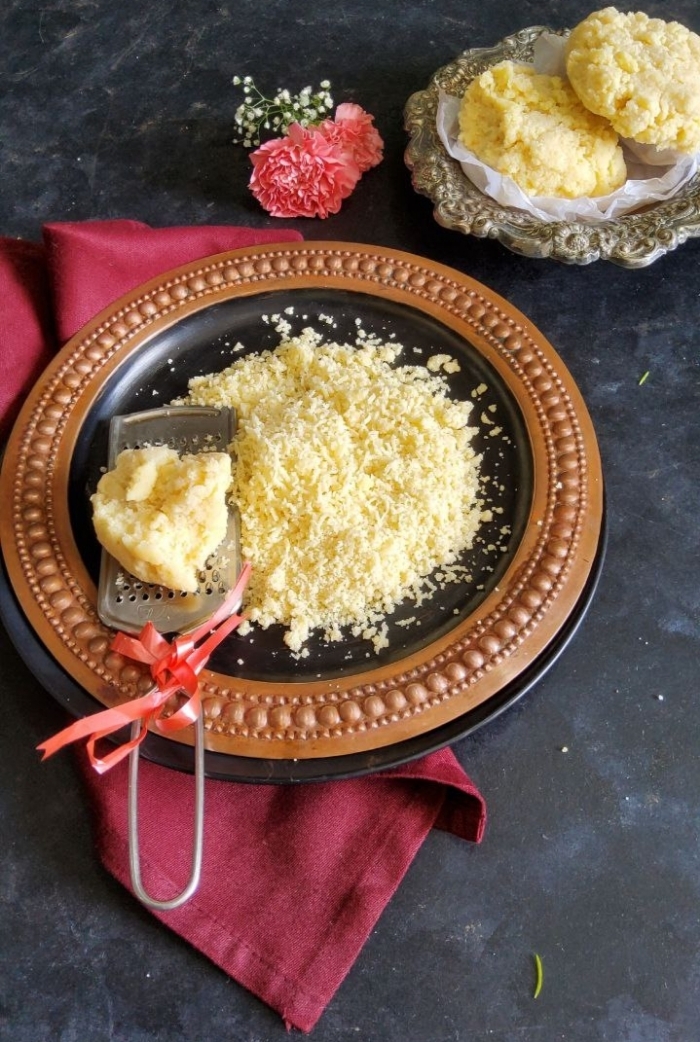
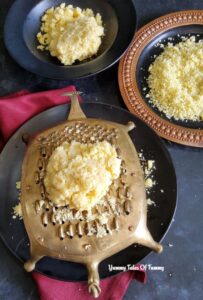
- Grate or crumble or use instant khoya as needed.
Notes
Step by step instructions and pictorial presentation to make 3 ingredient Instant khoya | Milk powder Mawa
To begin with measure out the ingredients and keep aside. Once we start cooking process to make khoya, it really needs speed.
Heat ghee in a non stick pan on a low flame.
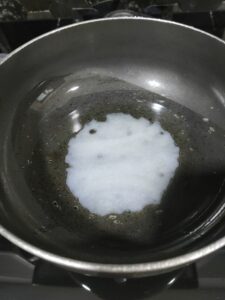
Once it’s melted add milk to this.
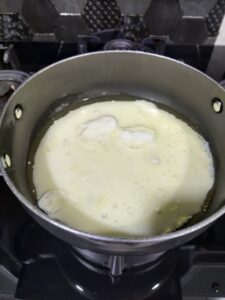
Keep the flame low and let the milk come to a gentle boil.
After that add milk powder by continuously stirring with a soft spatula so that no lumps are formed.
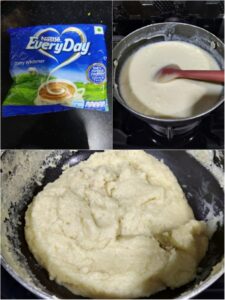
After a while the mixture will start to thicken and you will easily able to fold it over itself.
Cook further for 1-2 minutes more till the mixture appears soft and smooth. It will soon start to leave the edges and turn into a lump.
Take off from the stove and while still warm, immediately shape it into big round balls.

Once cooled down, store in the fridge for 3 to 4 days Or freeze for a month in ziplock bags.

Grate or crumble or use instant khoya as needed.
Notes
1. Make sure to keep the flame on low throughout while making khoya.
2. Use a wide, shallow non stick pan for making khoya. This helps you in easy stirring and also makes sure that nothing burns.
3. The khoya once cooled down will get thick and dry, so cook it accordingly.
4. The khoya gets hard when you store them in fridge. So when required place it on kitchen counter for some time (to bring back to room temperature) to make it softer.
I hope you guys enjoyed reading my today’s post. Please share your valuable feedback in comments with us, as we love to hear from you.
You can follow me on Facebook, Instagram , Pinterest, and on Twitter.
I will see you soon with yet another interesting recipe. Come right back a I love to have you around.
Happy Cooking
Regards❤️
Lata
Pin it for future reference 🔽


